

Mastering the Kettlebell Full Body Workout: A Technical Implementation Guide
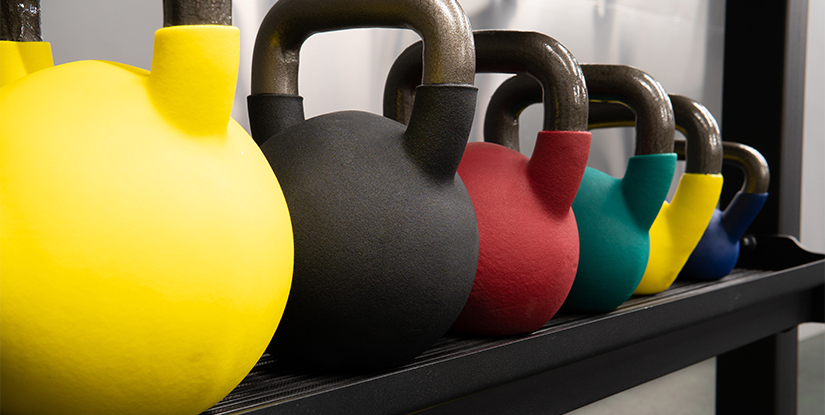
Selecting Optimal Equipment for a Kettlebell Full Body Workout
Before initiating a structured training regimen, an operator must first address the fundamental selection of the implement itself. The most common failure in long-term training progression is selecting a kettlebell weight or grip style that does not align with the user's specific biomechanical requirements. A poorly chosen kettlebell leads to premature fatigue in the forearm musculature or, more critically, an inability to maintain a neutral spine during high-velocity movements.
Cast Iron vs. Competition Grade Specifications
When deciding between standard cast iron bells and competition-style kettlebells, one must consider the center of mass and the surface texture. Cast iron bells often feature a more irregular, ergonomic shape that is excellent for grip strength but can be problematic for high-repetition ballistic movements. In contrast, competition bells offer a smoother, standardized diameter that facilitates consistent rotational velocity.
| Feature | Cast Iron Kettlebells | Competition Style Kettlebells |
|---|---|---|
| Surface Texture | Coarse, high-friction | Smooth, precision-milled |
| Handle Diameter | Variable/Ergonomic | Standardized/Consistent |
| Ideal Use Case | Static strength, heavy swings | High-rep ballistics, snatch, clean |
| Durability Profile | Extremely high/Impact resistant | High/Requires smoother handling |
Selecting the correct implement ensures that technical errors are a result of movement mechanics rather than equipment limitations. Once the hardware is verified, the operator can transition into the essential biomechanical setup required for safety.
The Fundamentals of Biomechanical Setup and Stability
The structural integrity of any kettlebell full body workout relies entirely on the foundation established during the setup phase. A common error is treating the kettlebell like a dumbbell, failing to account for the offset center of gravity that characterizes the tool. This misunder_understanding leads to lumbar instability and wrist strain.
Establishing the Neutral Spine and Bracing Protocol
To prevent spinal shearing, the practitioner must implement a rigorous bracing protocol. This involves not just 'tightening the core,' but creating intra-abdominal pressure through a structured breathing pattern. A failure to brace results in the 'hinge-to-squat' error, where the athlete unintentionally shifts from a posterior chain hinge to a knee-dominant squat mid-movement.
- The Hip Hinge: Pivot at the pelvis, not the waist; maintain a slight bend in the knees.
- Scapular Depression: Pull the shoulder blades down toward the hips to create a stable platform for the load.
- Eye Gaze: Maintain a neutral gaze approximately 4-6 feet in front of you to prevent cervical spine flexion.
Verification of this setup can be performed by observing the lateral line of the body in a mirror or video recording. With a stable structural foundation in place, the focus shifts to the primary kinetic drivers of the workout.
Mastering the Posterior Chain: The Swing and Deadlift
Effective kettlebell training utilizes the hinge to drive power, yet many operators struggle with the distinction between a vertical lift and a horizontal hinge. A misapplied hinge results in excessive spinal flexion, which is the primary cause of lower back discomfort in high-volume sessions.
The Kinetic Chain of the Kettlebell Swing
The swing is a ballistic movement that relies on the rapid extension of the hips. The error typically occurs when the athlete attempts to lift the weight with their arms rather than projecting it with their hips. To rectify this, the arms should function merely as tension cables, while the power originates in the glutes and hamstrings.
Verification Checklist for the Hinge:
1. Is the weight moving in an arc, rather than a straight vertical line?
2. Do the hips reach full extension at the apex of the swing?
3. Is the tension held in the hamstrings during the descent?
Mastering this hinge-driven power is a prerequisite for more complex unilateral movements. Moving from bilateral power to unilateral stability is the next logical progression in the training architecture.
Explore the complete technical specifications:
Adjustable Bench Exercises: Full-Body Movement Library for Fitness
Unilateral Strength and Rotational Control
While the swing builds raw power, unilateral movements address the often-overlooked issue of asymmetrical strength imbalances. A frequent problem encountered during unilateral exercises is the inability to resist lateral or rotational forces, which can lead to oblique strain or hip instability.
Implementing the Single-Arm Kettlebell Press
The single-arm press requires total-body tension to prevent the weight from pulling the torso into a lateral bend. As the weight moves overhead, the contralateral (opposite side) core stabilizers must work aggressively to maintain a level pelvis. If a practitioner finds themselves leaning toward the weight, the load is either too heavy or the core engagement is insufficient.
| Exercise Type | Primary Muscle Group | Common Failure Mode | Technical Fix |
|---|---|---|---|
| Single Arm Press | Deltoids/Triceps | Lateral Torso Lean | Increased Core Bracing |
| Goblet Squat | Quadriceps/Glutes | Chest Collapse | Elbow-to-Knee Cueing |
| Lunge with Weight | Lower Body/Core | Knee Valgus (Inward Collapse) | Foot External Rotation |
Consistent execution of these unilateral drills ensures that the body develops functional stability across all planes of motion. This stability provides the necessary support for the high-intensity, multi-planar movements that follow.
Explore the complete technical specifications:
1028 Gym Workout Explained | Programming, Benefits & Progression
Integrating Complex Multi-Planar Movements
A truly comprehensive kettlebell full body workout integrates strength, power, and coordination through complex sequences. The challenge for many operators is managing the transition between movements without losing the technical integrity of the subsequent exercise.
The Clean and Snatch: Managing Momentum
The clean and the snatch are advanced ballistic movements that require precise timing of the 'taming the arc' technique. A common mistake is the 'elbow slap,' where the practitioner fails to rotate the wrist early enough, causing the kettlebell to strike the forearm. This is caused by a lack of rhythmic coordination between the hip drive and the hand path.
To execute a proper clean, the practitioner must actively pull the bell around the body rather than being hit by it. This requires a high degree of technical proficiency and a controlled descent. Successfully navigating these transitions allows for the integration of higher-intensity metabolic conditioning.
Explore the complete technical specifications:
Kettlebell Muscle Building: Science-Driven Hypertrophy Programming
Optimizing Metabolic Throughput and Work Capacity
Once the technical mastery of individual movements is established, the focus shifts to the application of these tools for metabolic conditioning. The goal here is to maximize work capacity while maintaining a standard of technical accuracy under fatigue.
Structuring High-Intensity Intervals
The danger in metabolic conditioning is 'technical decay'—the progressive loss of form as the heart rate rises. An operator must decide between a density-based approach (EMOM) or a volume-based approach (AMRAP). Density-based training often provides a safer environment for maintaining form by enforcing fixed rest periods.
- EMOM (Every Minute on the Minute): Provides a clear benchmark for work capacity and ensures sufficient recovery.
- AMRAP (As Many Reps As Possible): Tests sheer psychological and physical endurance but carries a higher risk of form breakdown.
If the observer notices a change in the smoothness of the hinge or an increase in spinal rounding, the session must be terminated or the intensity reduced. Maintaining technical standards is more important than the total number of repetitions completed.
Explore the complete technical specifications:
32 kg Kettlebell | Heavy Cast Iron & Competition Bells for Advanced Training
Operational Recovery and Maintenance of the Practitioner
Just as the equipment requires inspection, the human element of the workout requires a structured recovery protocol. Failure to implement recovery often leads to systemic fatigue, which manifests as decreased power output and increased injury risk.
Post-Workout Biomechanical Reset
After a high-intensity session, the body often enters a state of hypertonicity, particularly in the hip flexors and spinal erectors. A structured cool-down is not a luxury but a necessary part of the training cycle. This involves targeted mobility work to restore the range of motion used during the workout.
Recovery Priority Matrix:
1. Hydration/Electrolytes: Immediate replenishment of lost fluids.
2. Active Mobility: Low-intensity movements to facilitate blood flow.
3. Sleep Hygiene: Ensuring the hormonal environment is optimized for tissue repair.
By treating recovery with the same rigor as the training itself, the practitioner ensures long-term scalability. With the recovery cycle understood, one can return to the initial phase of selection and planning for the next training block.
Explore the complete technical specifications:
Safety Protocols and Equipment Inspection Checklist
Finalizing the implementation of a kettlebell regimen requires a strict adherence to safety protocols. This involves both the physical inspection of the implements and the environmental assessment of the training space.
The Pre-Session Equipment Audit
A professional operator never begins a session without a visual and tactile audit of their tools. A compromised piece of equipment can lead to catastrophic failure during high-velocity movements.
- Handle Check: Inspect for hairline fractures or excessive wear that could cause a slip.
- Cast Integrity: Ensure there are no large cracks in the iron or coating.
- Floor Surface: Verify that the training surface is level and provides sufficient friction to prevent sliding.
- Clearance Zone: Ensure a minimum of 6 feet of unobstructed space in all directions of movement.
An inspection-first mindset transforms a standard workout into a professional-grade training operation. This systematic approach to safety and technique is what differentiates a durable routine from a short-term endeavor.