

Optimizing Your Facility with the Right Gym Floor Rubber Mat
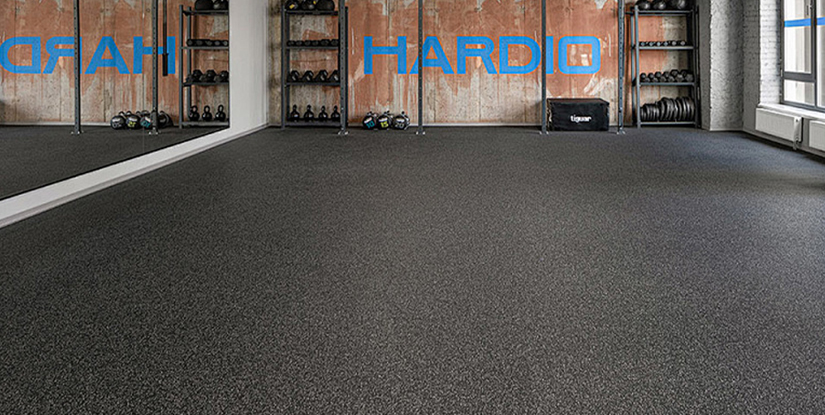
Defining Material Requirements for Gym Floor Rubber Mat Selection
Selecting the appropriate flooring is not merely a matter of aesthetic preference; it is a critical technical decision that impacts equipment longevity and user safety. Facility operators often face the dilemma of over-specifying density for low-impact areas or under-specifying shock absorption for heavy lifting zones. A mismatch in material density can lead to premature subfloor cracking or even structural damage to the building itself.
To avoid these costly errors, a professional must evaluate the specific mechanical demands of the training area. A Gym Floor Rubber Mat used in a yoga studio requires entirely different compression characteristics than one placed beneath a high-velocity drop zone. Understanding these nuances prevents the common mistake of purchasing high-density tiles for areas that require tactile grip and flexibility.
Density and Compression Archetypes
When evaluating density, operators should look at the Shore A hardness rating, which measures the resistance of the rubber to indentation. Higher density typically provides better stability for heavy racks, while lower density offers better ergonomic comfort for floor exercises.
| Application Type | Recommended Density | Primary Functional Goal | Ideal Thickness Range |
|---|---|---|---|
| Weightlifting/Drop Zones | High (Heavy Duty) | Impact Attenuation & Subfloor Protection | 20mm - 40mm |
| Cardio & Functional Training | Medium | Durability & Sound Reduction | 10mm - 15mm |
| Yoga & Stretching Areas | Low (Soft/Flexible) | Joint Comfort & Surface Grip | 6mm - 10mm |
| General Strength/Multi-purpose | Standard Commercial | Wear Resistance & Easy Maintenance | 8mm - 12mm |
By categorizing your zones based on these metrics, you ensure that the investment aligns with the physical stresses of the equipment. Once the material specifications are determined, the next critical step involves the physical layout and installation geometry.
Geometric Precision in Floor Layout and Installation
Moving from material selection to physical deployment, the way a Gym Floor Rubber Mat is laid out determines the long-term stability of the entire floor system. A common failure mode in commercial facilities is the development of "tripping edges" or gaps between tiles caused by improper measurement or thermal expansion oversight. If the layout does not account for the perimeter of the room, the flooring may buckle or pull away from the walls over time.
Precision in the layout phase involves more than just laying tiles edge-to-edge. It requires a deep understanding of the subfloor condition and the room's structural footprint. A poorly executed installation will result in uneven surfaces that can destabilize heavy machines or cause injuries during high-intensity interval training.
The Pre-Installation Checklist
- Subfloor Assessment: Verify the subfloor is completely level, dry, and free of debris. Any imperfection in the concrete will be magnified by the rubber.
- Thermal Expansion Gap: Leave a 1/4 inch (approx. 6mm) gap around the perimeter of the room to allow for material expansion and contraction.
- Orientation Mapping: Map out the starting point (usually the center or the longest straight wall) to ensure tiles are not cut into awkward, small slivers at the edges.
- Subfloor Adhesion Decision: Decide whether to use full-spread adhesive, double-sided tape, or a floating installation based on the expected weight of the equipment.
Successful installation provides a stable foundation, but even the best-laid floor requires a rigorous maintenance protocol to prevent degradation. Without a structured cleaning regimen, the surface can become a liability through slip hazards or material breakdown.
Maintenance Protocols for Longevity and Safety
A high-quality floor is a long-term asset, but its lifespan is directly proportional to the rigor of the facility's maintenance routine. Many operators fail to realize that certain cleaning chemicals can leach the plasticizers from the rubber, causing the material to become brittle or, conversely, overly gummy and soft. This degradation not only affects the look of the gym but also compromises the slip resistance of the surface.
The root cause of most floor failures in commercial gyms is the use of non-neutral pH cleaners or abrasive tools. When these substances interact with the rubber, they create a microscopic layer of residue that attracts dirt and increases the coefficient of friction to unsafe levels. Therefore, a standardized cleaning process is non-negotiable for professional facility management.
Daily vs. Weekly Maintenance Cycles
| Frequency | Action Item | Target Outcome | Prohibited Actions |
|---|---|---|---|
| Daily | Microfiber sweeping & Neutral pH Mopping | Removal of dust, sweat, and loose debris | Using bleach or ammonia-based solutions |
| Weekly | Deep vacuuming & Edge Inspection | Cleaning of corners and perimeter gaps | Using stiff-bristled scrubbing brushes |
| Monthly | Material Integrity Audit | Checking for discoloration or hardness changes | Applying wax or polish to the surface |
By adhering to these cycles, you maintain the structural integrity of the rubber. However, even with perfect maintenance, physical wear and tear from heavy equipment will eventually occur, necessitating a formal inspection process to detect early signs of failure.
Explore the complete technical specifications:
Detecting Material Degradation and Mechanical Failure
While routine cleaning manages surface hygiene, a professional operator must also monitor the structural health of the Gym Floor Rubber Mat system. Identifying degradation early can prevent expensive full-scale replacements. Most failures are not sudden; they are the result of gradual material fatigue or environmental stress that can be caught through systematic inspection.
A common error is ignoring minor discoloration or slight depressions in the floor. These are often the first signs of a localized subfloor issue or an inappropriate density choice for the load being applied. If a heavy dumbbell rack is causing a permanent indentation, the current floor thickness is insufficient for that specific zone.
Common Failure Modes and Diagnoses
To effectively troubleshoot, use the following diagnostic framework to determine if a section of the floor requires replacement or merely deeper cleaning.
- Problem: Surface Stickiness.
Cause: Residual cleaning agents or chemical spills.
Fix: Deep clean with a pH-neutral cleaner and distilled water. - Problem: Cracking at Seams.
Cause: Improper expansion gaps or thermal contraction.
Fix: Re-install perimeter pieces with appropriate spacing. - Problem: Excessive Noise/Vibration.
Cause: Voids beneath the mat or insufficient density.
Fix: Check subfloor leveling or upgrade to higher-density tiles in high-impact zones.
Identifying these signs early ensures that the facility remains both safe and aesthetically professional. With a solid understanding of how to diagnose issues, the operator is now prepared to manage the long-term lifecycle of the flooring asset.
Explore the complete technical specifications:
How to Plan a Gym Layout That Maximizes Floor Space | Expert Guide
Optimizing Return on Investment Through Strategic Procurement
The final consideration in the lifecycle of a gym floor is the procurement strategy itself. While it is tempting to opt for the lowest initial cost, a professional approach focuses on the Total Cost of Ownership (TCO). A cheaper, thinner mat may save money today but will result in significantly higher replacement costs and potential equipment damage within 18 to 24 months.
A strategic procurement model involves looking beyond the price-per-square-foot and evaluating the durability-to-cost ratio. This includes assessing the lifespan of the material in high-stress environments versus low-stress zones. An intelligent floor plan uses a hybrid approach to maximize both budget and performance.
The Hybrid Flooring Strategy
Rather than using a single type of rubber across the entire facility, smart operators implement a tiered approach. This method optimizes the budget by allocating high-performance materials only where they are truly necessary.
- Tier 1 (High Impact): Ultra-dense, thick rubber mats (30mm+) reserved strictly for the weightlifting and deadlift platforms.
- Tier 2 (Functional): Medium-density mats (10-15mm) for cardio, HIIT, and multi-purpose areas.
- Tier 3 (Light Duty): Low-density or specialized foam-backed rubber for stretching and mobility zones.
This tiered method ensures that every dollar spent contributes directly to either safety, equipment protection, or user comfort, depending on the specific needs of the zone. By following this guide, you can transition from a reactive stance to a proactive, professional management model for your facility's flooring.
Explore the complete technical specifications:
Environmental and Regulatory Compliance Standards
Beyond durability and cost, facility managers must consider the environmental footprint and regulatory compliance of their flooring choices. A Gym Floor Rubber Mat is often a large-scale purchase, and the long-term impact of the material's off-gassing and end-of-life disposal can affect both indoor air quality and corporate sustainability goals.
A frequent mistake in procurement is overlooking VOC (Volatile Organic Compound) levels. In enclosed fitness environments, high levels of off-gassing from low-grade recycled rubber can lead to unpleasant odors and potential respiratory discomfort for clients. Selecting materials that meet strict air quality certifications is a key decision criterion for premium facilities.
Compliance and Sustainability Checklist
- VOC Emissions: Ensure the product meets or exceeds indoor air quality standards to minimize chemical odors.
- Fire Rating: Confirm the material meets local building codes for flame spread and smoke development.
- Recycled Content: Evaluate the ratio of post-consumer recycled material to ensure a lower environmental impact.
- End-of-Life Plan: Determine if the manufacturer offers a take-back or recycling program for worn-out mats.
By integrating these compliance factors into your procurement process, you protect both your clients' health and your facility's standing with local regulatory bodies. Ultimately, a comprehensive approach—covering material science, installation, maintenance, and compliance—is the only way to ensure a high-performing athletic environment.