

How to Design a Strength Training Floor Plan for Your Gym
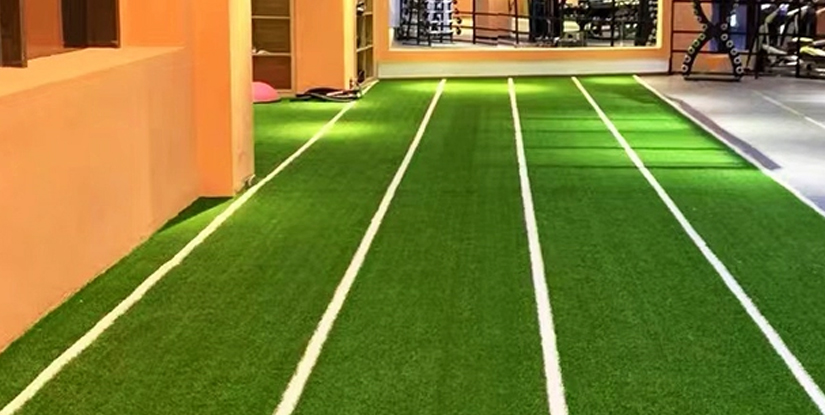
Designing a high-performance strength training zone is rarely a matter of simply placing machines where they fit. Most operators encounter a critical failure point early in their facility's lifecycle: the realization that their equipment layout is either obstructing traffic flow or creating safety hazards due to insufficient clearance. A poorly planned floor involves more than just aesthetic friction; it leads to accelerated equipment wear and potential liability issues. To avoid these high-cost mistakes, one must approach the floor plan as a highly engineered system where spatial volume, user safety, and equipment longevity intersect.
Identifying Spatial Constraints and Equipment Footprints
Before a single piece of heavy iron is unboxed, the primary task is to move beyond the basic footprint of a machine and account for its 'operational volume.' A mistake I frequently see in new facility builds is failing to distinguish between the machine's physical dimensions and the space required for its functional movement. For example, a cable machine might occupy a 1-meter square base, but the arc of the weight stack or the reach of the user can extend significantly further.
To mitigate this, you must establish a standardized 'Buffer Zone' for every category of equipment. This buffer is the empty space required for the user to perform the movement safely without colliding with neighboring machines or walls. If you ignore these margins, you will face a cluttered floor that feels cramped, regardless of your total square footage.
| Equipment Category | Typical Footprint (Base) | Recommended Operational Clearance | Failure Mode if Ignored |
|---|---|---|---|
| Power Racks / Squat Stands | 1.5m x 1.5m | +1m on all sides for barbell whip/plate loading | Collision with passing users during heavy lifts |
| Adjustable Benches | 1.2m x 0.5m | +1.5m longitudinal for movement arcs | Restricted mobility for seated exercises |
| Dumbbell Racks | 2.0m x 0.6m | +2.0m frontal space for ergonomic lifting | Trip hazards and uneven weight distribution |
| Cable Columns | 0.8m x 0.8m | +1.5m radius for cable arcs | Entanglement or hitting neighboring equipment |
Once you have accurately accounted for these operational volumes, the next step is to organize these zones into functional clusters to optimize user flow. This spatial logic informs how you will transition from individual equipment placement to the broader architectural layout.
Strategic Zonation: Organizing the Strength Training Floor Plan
Moving from individual footprints to a cohesive floor plan requires a method called 'Zonation.' Rather than scattering disparate machines across a room, you should group equipment based on user intent and physical intensity. A common error is placing high-impact areas, such as free weight lifting, directly adjacent to low-impact resistance machines. This creates a chaotic environment where a dropped dumbbell might strike a user on a seated machine, leading to both injury and equipment damage.
Effective zonation should prioritize the separation of 'High-Intensity/High-Noise' zones from 'Controlled-Movement' zones. By creating distinct sectors, you manage the psychology and safety of the room simultaneously. A professional-grade layout typically follows a gradient from high-stability zones (selectorized machines) to high-impact zones (free weights and platforms).
Developing High-Impact Free Weight Zones
The free weight area is the most demanding part of any strength training floor plan. It requires the highest degree of shock absorption and the most generous spatial margins. When designing this area, you must consider the path of a moving barbell, not just the static rack. A common mistake is neglecting the space required for plate loading; if a user cannot walk around a rack to load a 20kg plate without squeezing through a narrow corridor, your layout has failed.
- The Weight Plate Test: Ensure there is at least 0.8m of clear space on either side of a barbell to allow for easy loading and unloading.
- The Barbell Path Margin: For Olympic lifting, ensure the clearance is at least 1.5m wider than the barbell itself to account for human error and lateral movement.
- Traffic Isolation: Never place a high-traffic walking path through the center of a free weight zone.
Successfully isolating these high-intensity zones allows you to implement specialized flooring, which is the next critical layer of your design architecture.
Explore the complete technical specifications:
Dumbbell 5kg: Commercial Specifications, Usage, and Procurement
Optimizing Surface Selection and Subfloor Durability
Because you have already accounted for the operational volume of the equipment, your attention must shift to what lies beneath it. A recurring failure in gym design is choosing a flooring material based solely on aesthetics rather than the specific impact requirements of the equipment above. If the floor cannot withstand the dynamic loads of your strength zones, you will face subfloor cracking or even structural damage to the building.
The relationship between equipment weight and floor material is a technical calculation of 'Impact Loading.' For example, a heavy deadlift station requires vastly different specifications than a light dumbbell area. Relying on a single, uniform floor type throughout a strength facility is a cost-effective mistake that often leads to expensive repairs in high-traffic zones. You must match the material density and thickness to the equipment's specific impact profile.
| Area Type | Recommended Material | Standard Thickness | Primary Function |
|---|---|---|---|
| Dumbbell & Free Weight | High-Density Vulcanized Rubber | 15mm - 25mm | Impact absorption and noise reduction |
| Selectorized Machines | Low-Profile Rubber Tiles | 8mm - 12mm | Scuff resistance and static stability |
| Olympic Lifting Platforms | Multi-Layered Platform System | Custom (Wood/Rubber mix) | Shock attenuation and rotational stability |
Selecting the right surface ensures that your floor plan remains structurally sound under heavy use, but the floor's durability is only as good as your maintenance and inspection protocols.
Establishing Maintenance and Inspection Cycles for Safety
Even the most perfectly designed floor plan will degrade without a rigorous operational oversight strategy. As an operator, you must view your layout not as a static image, but as a dynamic system subject to wear. The physical movement of heavy weights and the constant friction of users can eventually compromise both the flooring and the equipment placement. A failed inspection of your floor plan can result in uneven surfaces or loose hardware, which are direct precursors to accidents.
A robust maintenance plan involves both daily visual checks and scheduled technical deep-dives. You cannot wait for a floor tile to lift or a bolt to loosen before taking action; you must implement a proactive cadence to ensure the design integrity is maintained over time.
Routine Maintenance Checklist for Operators
To maintain the safety standards established during your design phase, incorporate these checks into your facility's standard operating procedures:
- Daily Visual Audit: Check for any protruding edges on rubber flooring or areas where moisture may be accumulating.
- Weekly Fastener Inspection: Examine the mounting bolts of power racks and heavy machines for any signs of loosening or structural fatigue.
- Monthly Surface Integrity Check: Inspect high-impact zones for thinning rubber or permanent indentations that might create a trip hazard.
- Quarterly Weight-Bearing Audit: Verify that the weight stacks and movement paths of cable machines are still within their intended operational volume.
Following these protocols ensures that the technical advantages of your initial design are preserved. Once the safety and maintenance structures are in place, the final consideration is the long-term ROI of your equipment selection.
Optimizing Lighting and HVAC for User Performance
While much focus is placed on the physical layout, the environmental factors of lighting and HVAC are often the unsung heroes of a successful strength training floor plan. A well-designed room can still feel uninviting or even unsafe if the lighting is too dim for heavy lifting or if the ventilation is insufficient for high-intensity metabolic output. A common failure mode is designing for high-density equipment but neglecting the heat signature produced by that equipment and the users.
Lighting must be carefully calibrated to provide high visibility for complex movements (like Olympic lifts) without causing glare on equipment surfaces. Similarly, air circulation must be zoned to ensure that heat-generating areas, such as the free weight section, do not become hotspots that discourage usage. This environmental engineering is what separates a standard gym from a professional performance center.
Environmental Design Parameters
- Lux Levels: Maintain high luminosity in technical lifting zones (e.g., platforms) to ensure clear visibility of weights and floor markings.
- Air Exchange Rates: Ensure HVAC systems can handle the increased CO2 and thermal load of high-impact strength training zones.
- Light Placement: Avoid placing bright, direct light sources directly above squat racks to prevent visual impairment during the concentric phase of a lift.
Integrating these environmental controls into your initial floor plan ensures that the physical layout is supported by a comfortable, high-performance atmosphere.
Balancing Equipment Lifespan with Floor Plan ROI
Every design decision—from the thickness of the rubber to the distance between racks—impacts your long-term return on investment (ROI). While it may be tempting to maximize the number of machines to increase revenue, over-densifying a strength training floor plan often leads to a high turnover rate of both equipment and members. A crowded gym feels unprofessional and increases the frequency of maintenance-driven downtime.
True ROI comes from a balanced approach: high-quality, durable equipment placed in a layout that respects the user's movement. This creates a premium experience that justifies higher membership rates and reduces the frequency of expensive equipment replacements caused by collision-induced damage. When you design for space and durability rather than sheer quantity, you are building a sustainable business asset rather than just a room full of metal.
The successful design of a strength training floor plan is a continuous cycle of planning, implementation, and meticulous oversight. By prioritizing operational volume, strategic zonation, and high-specification surfacing, you ensure that your facility remains a safe, high-performing environment for years to come.